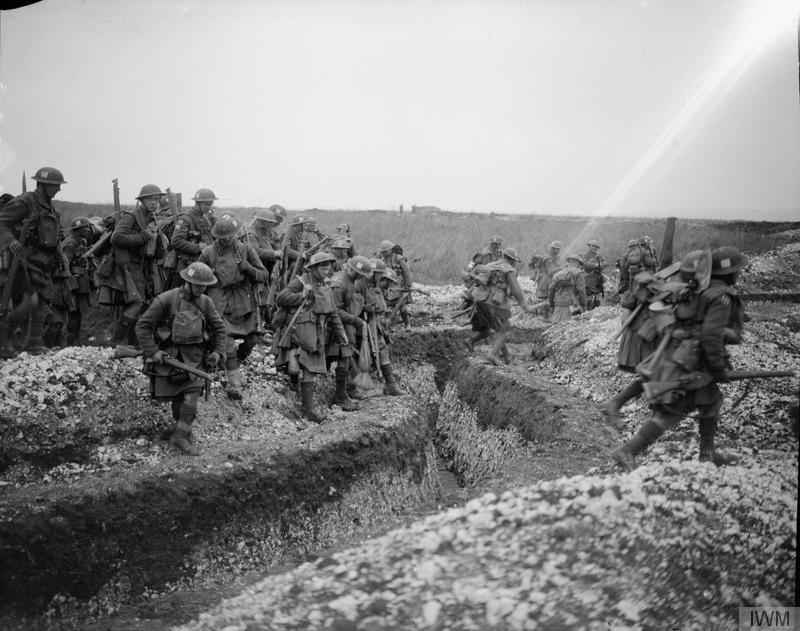
By 1917 the British Army’s notions of war had changed entirely. Any romantic ideals of the glory of combat and the open battlefield had been trampled and drowned in the blood-drenched, rain-slicked mud and barbed wire of the trenches of the Somme. Men fought and died for yards that felt like inches. Three years of almost imperceptible movement in the fields of France had pulled the wool from British commanders’ eyes.
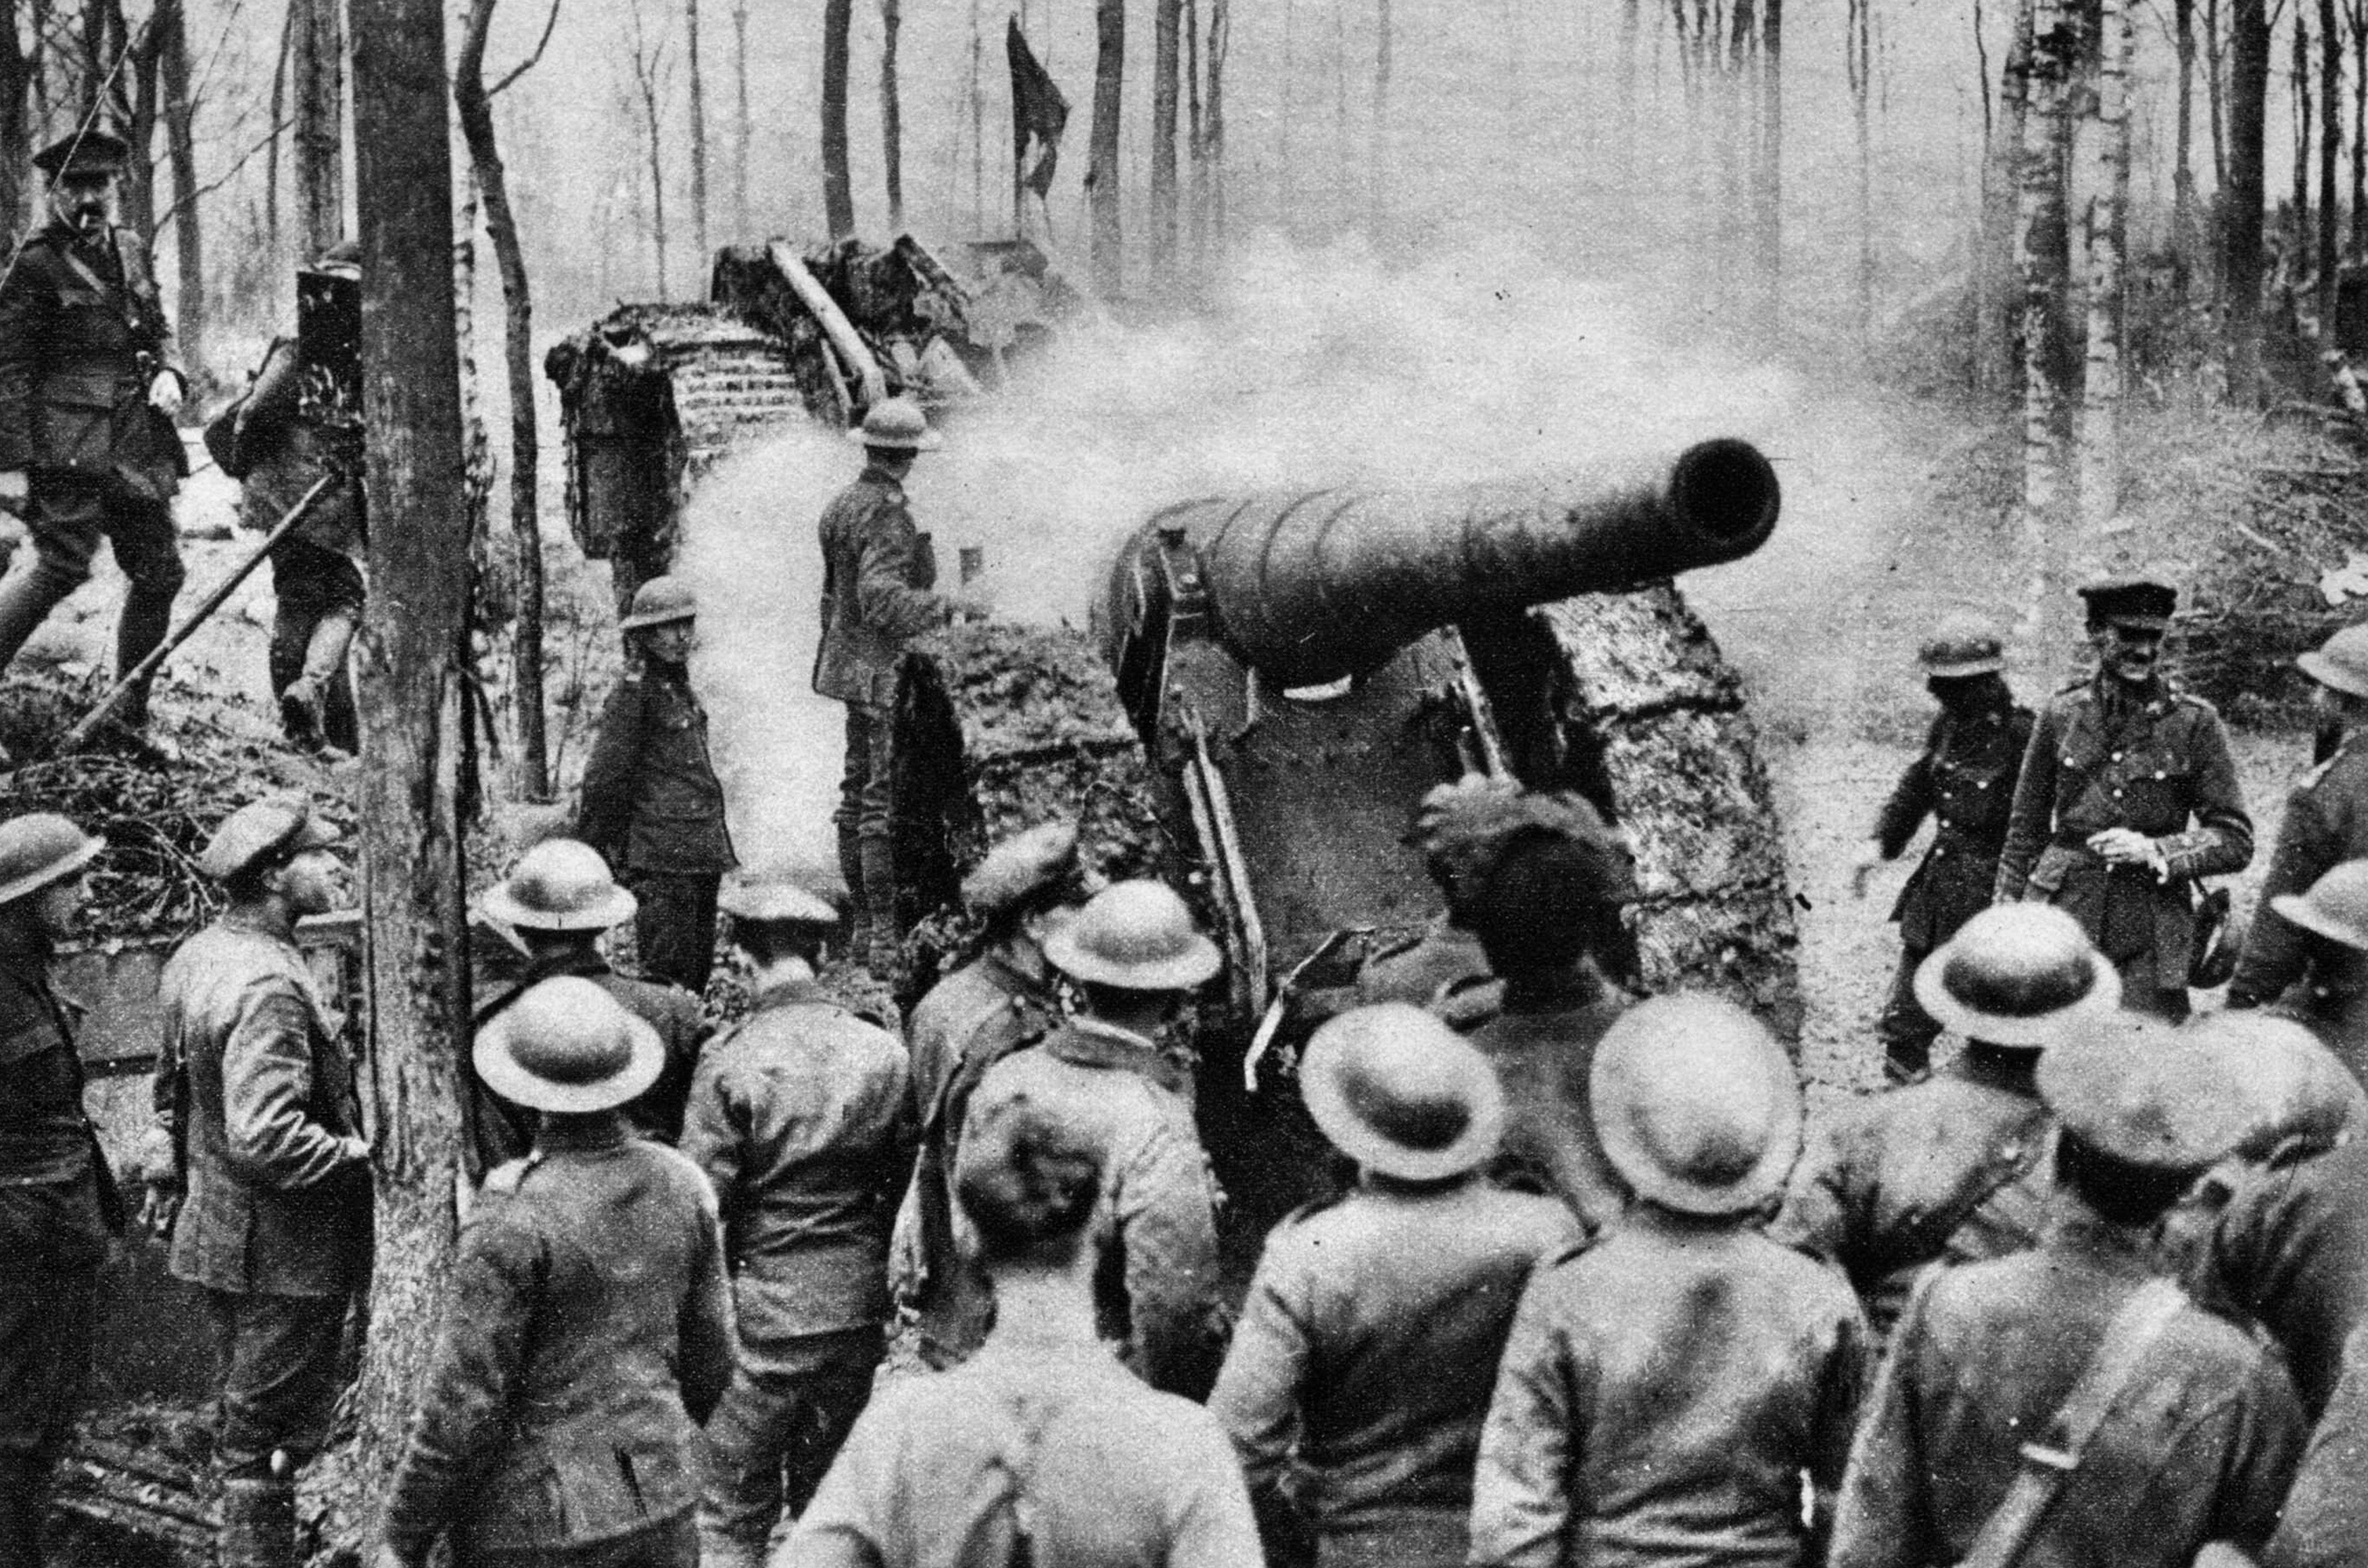
With change so desperately needed, it’s not surprising that the plan of attack at Cambrai was the product of ideas from three groups. British preliminary bombardment meant German forces were always alerted to the fact an attack was imminent, enabling a tactical retreat before a counter-attack. In August 1917, artillery commander Brigadier General Henry Hugh Tudor proposed ‘silent registration’ of guns, bringing the artillery to the battlefield without alerting the enemy. This process would be greatly assisted by the use of the No.106 instantaneous fuses, which meant that shells would detonate immediately on impact.
Meanwhile, the Tank Corps’ Brigadier General Hugh Elles and Lieutenant Colonel John Fuller were desperate for a chance to show their machines’ worth. Fuller was convinced they would be capable of conducting lightning raids to smash resistance and drive the British line forward. This dovetailed neatly with Tudor’s plan, as General Julian Byng, head of the Third Army, recognised. Byng turned his eye to Cambrai, a quiet area used by the Germans as supply point. While it was very well defended with the deep trenches of the Hindenburg Line and barbed wire, an attack would certainly be unexpected despite the area’s strategic value.
With six infantry divisions, five cavalry divisions and nine tank battalions, more than 1,000 guns were mustered for the attack. There would be a front of around 10,000 yards, covered by the III and IV Corps of the Third Army, which would be widened as the attack progressed. The III Corps had to break the Masnières-Beaurevoir line, enabling the cavalry to circle around Cambrai and cut it off from reinforcements before 48 hours had passed. Obviously, secrecy was paramount.
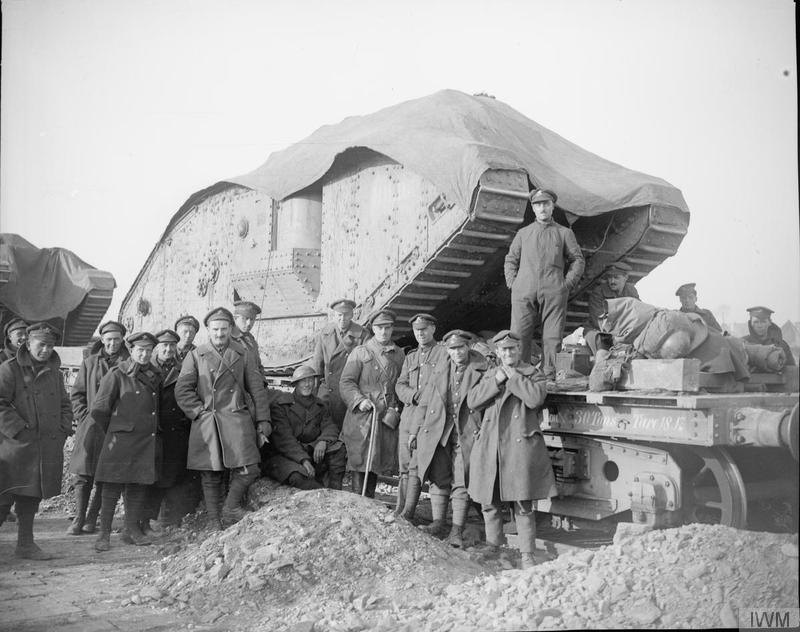
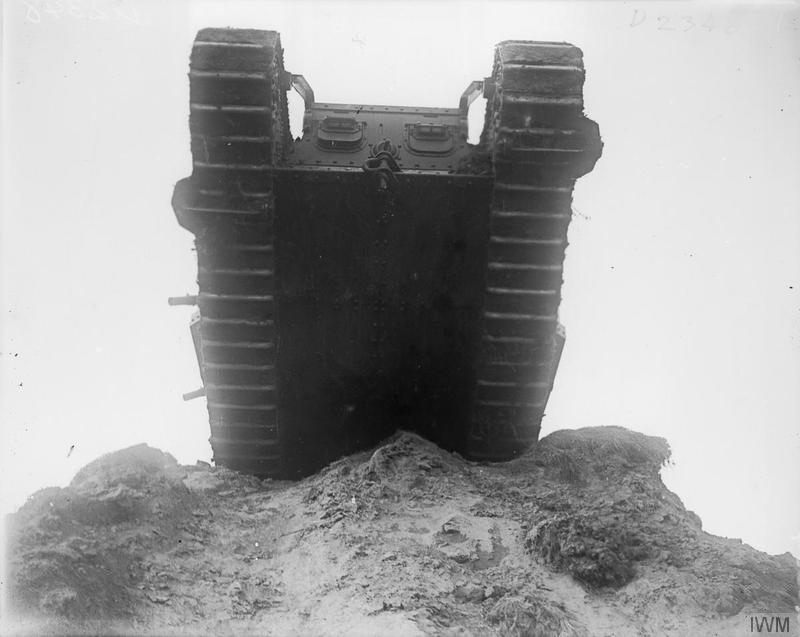
The Mark IV tanks were divided into “male” and “female” groups, with the former having four Lewis guns and two six-pounder Hotchkiss naval guns. The latter were each fitted with six Lewis guns. Without the naval guns, the “female” tanks were lighter, at 26 tons, while the “males” weighed 28. The crews also noticed that while the males had a door at the back, the female tanks had doors closer to the ground that were harder to get out of in an emergency. Eight men shared the single space with the engine, while the machine was only capable of reaching a speed of 3.7mph, and more typically around 1mph over bad terrain.
The tanks would lead, providing cover for the infantry as they crushed the barbed wire effortlessly under their tracks. As for navigating the trenches, each tank carried a fascine – a bundle of wood and branches, which would be deposited into the trench in order to fill it, so that the vehicle could drive over it. Meanwhile, a grapnel was fitted to some of the tanks to enable them to drag away the crumpled wire as they went, so that the path was clear for the advancing cavalry.
Several things needed to go very right in order for this so-called “clockwork” battle to work. Haig had fallen victim to overreaching in previous campaigns and he was determined that the Cambrai offensive have limited objectives and stick to its time frame. Minimising losses was crucial – even more so when he was forced to send two divisions to support the Italian front. Co-operation and communication between the divisions was also vital, as the battle’s events would prove.
The Battle of Cambrai rumbles to life
The attack began at 6.20am on 20 November as the artillery began shelling. With this stunning overture, the tanks advanced into the fog. The gentle incline made things very easy for the drivers, while the infantry marvelled at the ease with which the tanks rolled over the barbed wire as they followed them into battle, as did the men inside.
The initial advance seemed to be going impossibly well. The “clockwork battle” was living up to its name as the Germans were taken completely by surprise by this sudden, shocking attack. The British artillery kept up a devastating rate of fire, as much as possible given the two-rounds-per-minute rule to avoid overheating. The advance was also supported by the Royal Flying Corps, whose targets were on the ground rather than in the air. As the pilots braved machine-gun fire to drop their payloads, the weather worked against them. An Australian squadron pushed through punishingly thick fog at Havrincourt, barely able to see one another, let alone their targets. If their planes went down, they had to fight their way back to their lines, as Lieutenant Harry Taylor was forced to do, picking up the weapon of a fallen man and setting out to find support.
This isn’t to say there was no resistance. A myth sprung up as the days went on about a German gunner who held the enemy at bay entirely by himself. That myth does a disservice to the determination and skill of the men who suddenly found themselves on the back foot. Some of the troops stationed near Cambrai had come from the Russian front and had never seen a tank before. It’s impossible to know what these soldiers thought as the metal leviathans rolled towards them, but they fell back on their training, resisting where possible before making a tactical retreat.
Before long, communication began to prove an issue. When the tanks worked in tandem with the infantry, such as through Havrincourt and Graincourt, things went very smoothly. Elsewhere, infantrymen were forced to bang on the door of the tanks to get their attention, while confusion over objectives led to groups of infantry being forced to take key positions without artillery support. However, sitting in these slow-moving targets had its own terrors. They drew the bulk of enemy fire and if the engine gave out, whether due to attack, water in the fuel tank, or even a fire, the tank became a sitting duck. Once engaged in combat, the inside of the tank would become incredibly hot as the guns began to fire and the sound of their doing so was deafening. Visibility was shockingly poor, while the fact that most tanks had to stop in order to turn meant that they were a popular target on the battlefield.
Nevertheless, the speed with which they were taking ground was intoxicating; each trench taken and each line of wire cleared was another step towards the objective and morale had rarely been higher. As the tanks moved further away from their lines of reinforcement, establishing a clear road and lines of communication back became crucial. However, the supply mules proved nearly useless in the tangle of mud and wire, while the narrow roads quickly became clogged with traffic back and forth, ferrying wounded and prisoners.
The Third Army consolidates
Despite the ground gained, the first day ended with some major concerns. While crossing trenches had proved easy enough for the tanks, moving past the St Quentin Canal was another matter indeed. A crucial bridge at Masnières had been crushed by a tank that had attempted to cross the canal, stopping the planned infantry advance, while another had been mined. The cavalry was delayed by the clogged roads, while a lack of communication frequently meant they were stranded or forced to retreat. A lone squadron of Canadian cavalry realised it was the only unit to make it across the canal at Masnières and was forced to find its way back around and across.
Meanwhile, the key village of Flesquières had not been captured after the advancing tank divisions became separated from the infantry of the 51st (Highland) Division. With no infantry support, the tanks were target practice for the gunners at Flesquières Ridge and suffered huge losses. Messengers from the battlefield, some of whom walked the two miles on foot, struggled to convince their commanders that Flesquières had not yet been captured. Crucially, Major General George Montague Harper refused to commit any of the troops held in reserve to take the objective.
The second day required consolidation and advancement. Masnières was taken in the morning, but as a salient it was open to a punishing amount of shell and machine-gun fire, and the German air force soon reappeared to make life very difficult for the British troops. Meanwhile, the tanks had used all their improvised wooden fascine bridges on the first day, which made crossing the trenches difficult, and the infantry were reluctant to advance without them.
Things looked much better for the IV Corps, which advanced on Flesquières dreading the prospect of a prepared German resistance, only to find it had been abandoned. In contrast, while the cavalry helped take Cantaing, it struggled to work in tandem with the tanks as planned. Similarly, as the tanks moved into villages, it became clear they were not prepared for street fighting. With no machine gun on the top of the tank (it would be introduced in 1918), they were horribly vulnerable to fire from second-storey windows. Still, Fontaine was secured despite heavy losses, leaving Bourlon and its dense wood as the next target.
The offensive was on a knife edge without enough men to consolidate these gains. Fontaine was incredibly vulnerable, but was refused any artillery support and destroyed bridges made moving supplies incredibly difficult. Meanwhile, the German vantage points of Bourlon and Bourlon Wood posed a serious threat to the British. After a last-ditch effort ordered by Byng to push through, the order came to halt and dig in.
When Haig learned of the attack’s successes and failures, he decided to junk the 48-hour time limit and continue the advance. He toured the battlefield, congratulating the men and helping to spread the myth of the lone German gunner at the Flesquières Ridge, as that was surely a better explanation for the number of ruined British machines on the battlefield than the alternative. During this apparent lull on 22 November, German forces rushed Fontaine and retook it. Resistance was growing, and as the British dug in for the night in the miserable November cold they knew that their momentum was dripping away. Haig stressed to Byng that Bourlon and Fontaine must be captured by the end of 23 November.
Bitter fighting at Bourlon Wood
The fresh offensive was major, with 400 guns and 92 tanks, while the 40th Bantam Division was dispatched to relieve some of the exhausted men at the front. The tanks met fierce resistance in Fontaine, and were forced to withdraw to the disapproval of Tanks Corps intelligence officer Captain Elliot Hotblack, who saw the effect their retreat had on the infantry’s morale. Further down the line, German infantry made life hell for the tanks, finding the machine gunners’ blind spots and throwing hand grenades inside, leaving the British soldiers trapped and burning.
Having reached Bourlon Wood with the help of the tanks, fighting through the thick wood was now the infantry’s job alone. It was here that some of the most-intense and gruesome combat was seen. Running from tree to tree, with an unimaginable noise of ceaseless gun and artillery fire, a huge number of British soldiers were lost in Bourlon Wood.
When the German forces were finally pushed out, they started shelling it. Meanwhile, both Bourlon and Fontaine remained in German hands despite attempts in the afternoon, but the casualties on both sides were horrific. As night fell, troops were sent to support the men in Bourlon Wood as counterattacks from the Germans continued well into the night. Haig told Byng that Bourlon ridge simply must be taken, so the Guard division was summoned to support and relieve the depleted forces.
Throughout 24 November, shelling and counterattacks continued on Bourlon Wood. Poor weather made it difficult for any RFC pilots to take to the skies and challenge the forces of the recently arrived Manfred von Richthofen, the Red Baron, whose planes rained fire on the wood. German efforts to grind down the soldiers in the wood continued throughout the day. Counterattack met counterattack, and 25 November saw further terrible lapses in communication and bloody skirmishes. Battalions without tank support were mown down by machine-gun fire at Bourlon, while an entire cavalry regiment ordered to wait within sight of the German artillery was shelled. A furious Haig ordered the capture of Bourlon and Fontaine by the 27 November, as German forces continued to push at the exhausted British throughout the night.
A planned attack on 26 November was the cause of fierce argument between Major General Braithwaite, who bemoaned the lack of support and fresh troops, and Byng, who had his instructions from Haig. The attack went ahead, as Fontaine was taken at tremendous cost and targets in Bourlon Wood were reached. However, there was barely time to note the achievements before counterattacks drove the British forces back.
The German offensive
While skirmishes wore both sides down, the time had come for the major German counter-offensive after reinforcements had been arriving since the second day of the attack. Planned by Crown Prince Rupprecht of Bavaria, and widened by his superior General Erich Ludendorff, it was the first offensive planned against the British since 1915. Gas was fired into the wood two days before the attack, and at 6am on 30 November the assault began. Despite the warnings of some key officers, the British troops were simply not prepared for the assault at Gouzeaucourt, as German soldiers swarmed the British line and amassed prisoners. This was the first instance of the German stormtroop tactics, as the first wave of soldiers went around targets and cut them off as the further troops arrived.
As British soldiers realised what was happening, across all their lines, attempts were made to regroup and stand their ground as startled officers threw down their shaving kits and looked for their weapons. While German forces broke through in some places and were held up in others, communication broke down once again. There was simply no plan in place for this kind of counterattack, meaning that any attempts to fight back and reclaim ground were made on the hoof.
Much as the Germans had offered fierce resistance, so too now did the British. At Les Rues Vertes, the inspired and determined defensive tactics of Captain Robert Gee meant that their position and the brigade’s ammunition dumps were held. He set up a Lewis gun, organised bombing raids against the attackers, killed two Germans who had infiltrated his position and killed the guards, before charging a German machine-gun post with his two pistols. While seeking medical attention he was forced to jump into a canal and swim to safety. His actions earned him the Victoria Cross.
As reinforcements arrived, the Guards Brigade retook Gouzeaucourt, while the forces in Bourlon Wood held determinedly to their positions. The conflict turned into a series of costly but unproductive skirmishes. As the days passed and the casualties mounted, Haig finally realised the necessity to fall back and form a line for the winter. He ordered a retreat on 3 December and by 7 December the lines had settled, with both sides having made considerable gains and losses in territory.
The British casualties numbered 44,207 killed, wounded or missing. The number of German losses has proved harder to calculate, with estimates ranging between 41,000 and 53,300. The battle has proven to be one of the most fertile grounds for myths of the First World War to form, but what is clear is that crucial lessons were learned in how important communication and co-operation between different divisions was.
A lack of support in reserve, a lack of communication, and that terrible desire to overreach led to the attack’s failure. While it may have been the first large-scale tank offensive in the war, this landmark came at a terrible cost to both sides.
For more on the First World War a century on, subscribe to History of War for as little as £26.